Flat green beans almost always come down to one of a handful of problems: pollination failure, heat or water stress during pod fill, harvesting at the wrong time, or a nutrient imbalance in your soil. The good news is that most of these are fixable once you know what you're actually looking at. Let's walk through what's happening inside that pod and what's most likely going wrong in your garden right now.
What Causes Green Beans to Grow Flat and How to Fix It

Marcus Hendrick
24 Mar 2026
What a normal green bean pod looks like (and what "flat" really means)
A healthy snap bean pod should feel firm and rounded when you roll it between your fingers. The wall of the pod is fleshy, the seeds inside are small and not yet bulging through the sides, and the whole thing snaps cleanly when you bend it. That's what you're aiming for.
"Flat" is actually a catch-all word gardeners use for a few different problems, and it helps to be specific about which one you're seeing. There are at least three distinct versions:
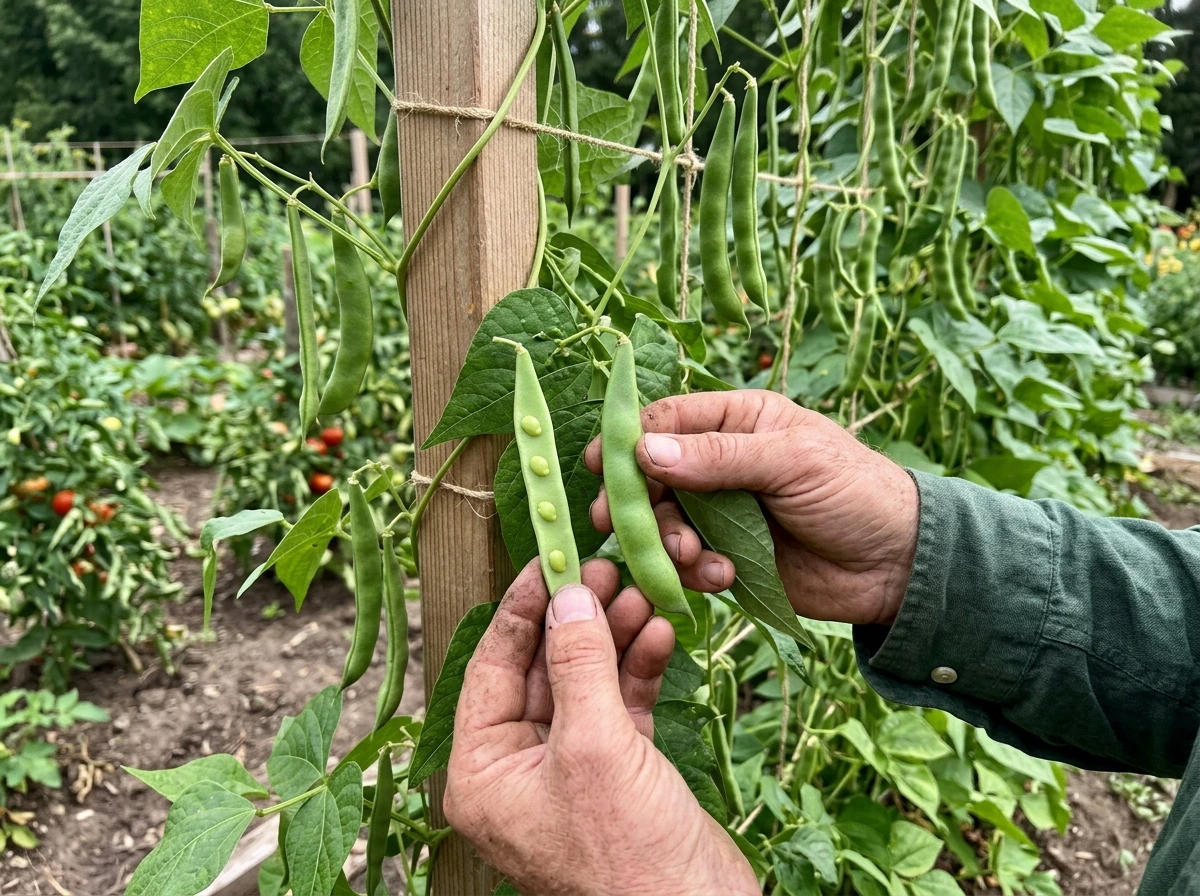
- Completely flat, papery pods: The pod formed but the seeds inside never developed, leaving nothing but a thin shell. This is almost always a pollination or extreme heat problem.
- Twisted, curved, or lumpy pods: The pod started filling but developed unevenly, often from stress during seed fill, pest feeding inside the flower, or a viral infection.
- Tiny, underdeveloped pods that drop off: The flower was pollinated but the plant aborted pod development under stress. You'll often find these as small shriveled pods on the ground under the plant.
- Overmature, bulging pods that look deformed: The seeds grew too large and are pressing through the pod wall. This isn't underfilling, it's the opposite, and it means you waited too long to harvest.
Knowing which of these you have narrows down the cause dramatically. For most home gardeners, the completely flat or underfilled pod is the frustrating one, and that's what most of this article focuses on.
Pollination problems, heat, and plant stress
The most common reason for flat, empty pods is that the flower wasn't properly pollinated before it formed a pod. Green beans are self-pollinating, which sounds convenient, but the pollen still has to be viable and transferred within the flower at the right moment. When conditions aren't right, pollen fails, the flower drops without setting a pod, or a pod forms but stays flat because no seeds developed inside it.
Heat is the biggest culprit here. Once daytime temperatures climb above 90 to 95°F, pollen viability drops sharply. Nighttime temperature matters too: nights above 75°F or below 60°F can both cause flowers and small fruits to drop before they develop. If you've had a heat wave during your plants' flowering period, this is almost certainly your answer. The plant isn't broken; it's protecting itself by aborting pods it can't fill under those conditions.
Dry, hot wind makes the problem worse. Wind speeds up moisture loss from the flower tissue, desiccates pollen, and can knock flowers off before they've had a chance to set. You'll sometimes see blossom drop happen fast during a stretch of dry, windy, hot weather, leaving plants that look healthy but are producing almost nothing. Prolonged wet or waterlogged soil has a similar effect: roots under water stress can't support fruit set, so the plant drops flowers before pods ever form.
Physical plant stress from any source, including insufficient sunlight, root disturbance, or being recently transplanted, can also reduce fruit set. Beans generally need a full six to eight hours of direct sun daily. Plants in partial shade set fewer pods and the ones that do form tend to be less filled out.
Variety, maturity stage, and when you pick
Not all green beans look the same at the same stage of development, and the variety you're growing matters more than most people realize. Some bean types naturally produce thinner, flatter pods. Romano beans, for example, are flat-podded by design. If you picked up seeds from a bulk bin or got them unlabeled, you might simply be growing a flatter-podded cultivar. That's not a problem, just a characteristic.
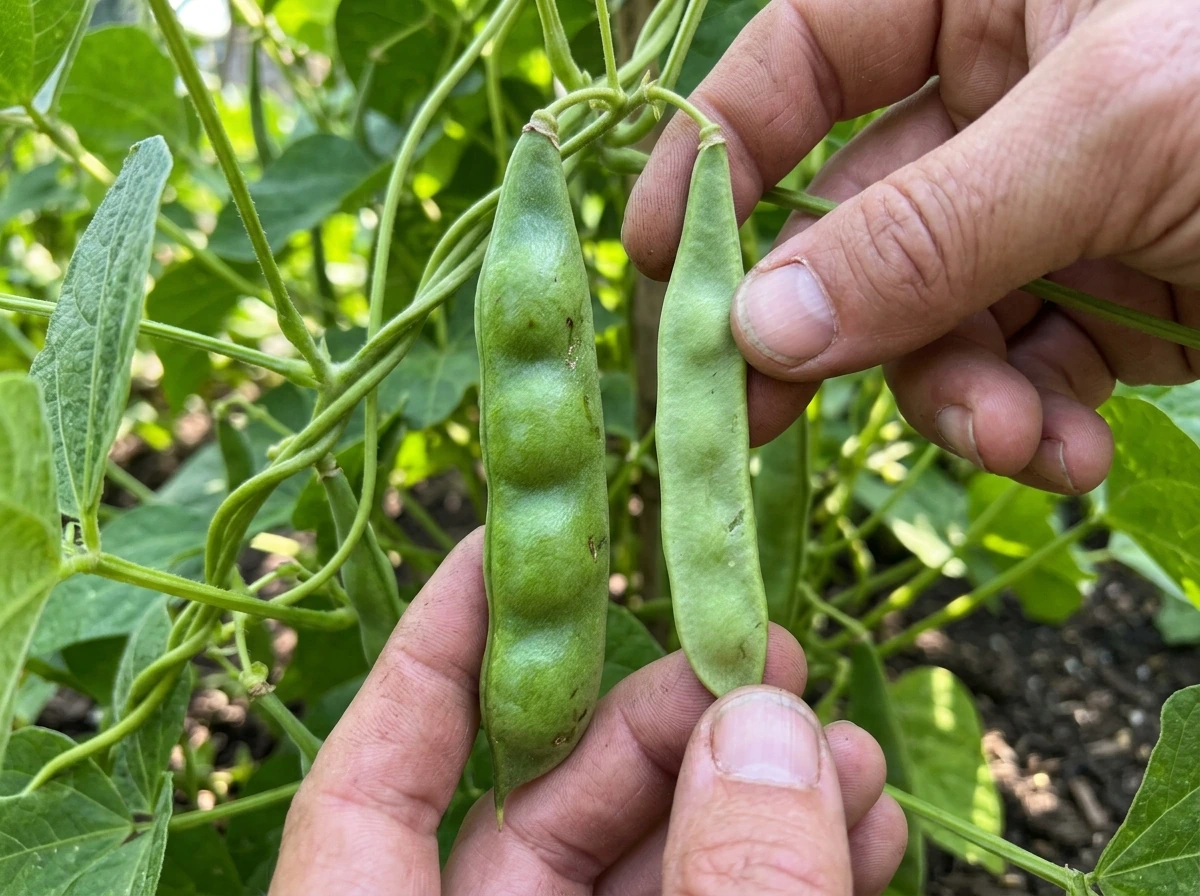
Harvest timing is the other big variable. Snap beans are typically ready about 8 to 10 days after flowering. Wait much longer and the seeds inside grow large enough to press against the pod wall, making it look lumpy and misshapen. Wait even longer and you're looking at a dry bean, not a snap bean. On the other end, picking too early gives you pods that are technically flat because they haven't had time to fill. The sweet spot is when the pod is full-sized and firm but the seeds inside haven't yet started bulging the sides. If you can feel individual large seeds pressing through the pod skin, you're already late.
Because bean plants flower and pod at different times on the same vine, checking every two to three days during peak production is worth the effort. Pods that are left too long signal the plant to slow down new production, so frequent picking actually encourages more pods, and it prevents the overmaturity problem entirely. This is especially relevant if you're supporting pole beans on a trellis (something worth considering if you haven't already set up support structures for your vines).
Soil, nutrition, and watering problems
Even with good weather and the right variety, what's going on below the soil surface directly shapes the pods above it. Nutrition and moisture issues
Too much nitrogen
Beans fix their own nitrogen through root nodules, so they genuinely don't need heavy nitrogen fertilization the way heavy feeders like corn or squash do. If you've added a lot of nitrogen-rich fertilizer (fresh manure, high-N synthetic fertilizer, or excess compost) before planting, the plant will put its energy into lush green leaf and stem growth instead of flowering and fruiting. You'll see big, healthy-looking plants with very few pods, and the pods that do form may be thin and poorly filled. If your bean plants look almost too good, that's a warning sign.
Potassium, calcium, and boron
Pod fill depends on potassium moving sugars into the developing seeds, calcium maintaining cell wall strength in the pod tissue, and boron assisting with calcium uptake and pollen tube development. Low potassium leads to poor-quality, poorly filled pods. Calcium deficiency can occur even when calcium is present in the soil if root function is impaired by waterlogging, salinity, or root damage, because roots can't take up what they can't reach. Boron toxicity from over-application is also possible and causes its own pod quality problems, so more isn't better here.
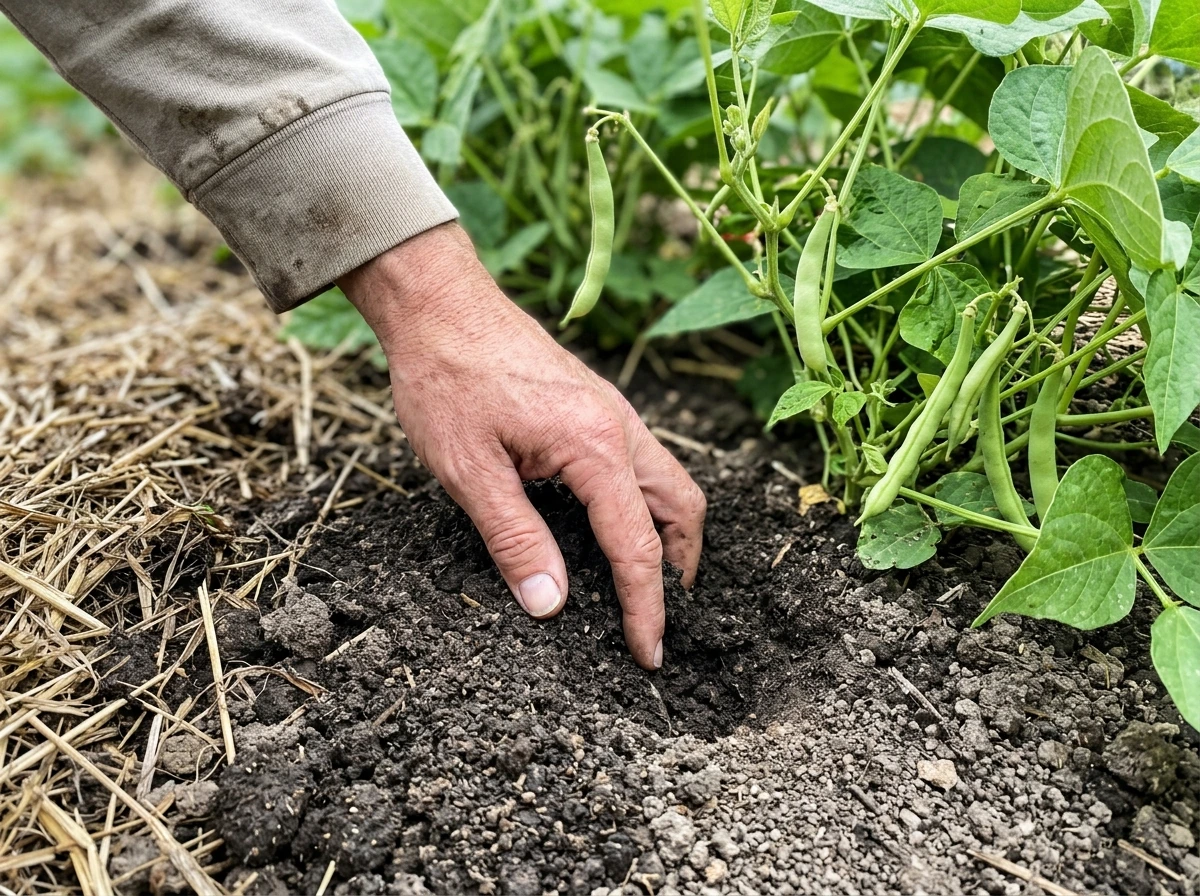
Inconsistent watering and drainage
Moisture is most critical during flowering and pod set. Letting soil dry out during that window stresses the plant into aborting pods. But waterlogged soil is just as damaging: roots can't absorb nutrients or oxygen when they're sitting in standing water, which produces the same symptoms as drought stress. The goal is consistently moist but well-drained soil throughout the growing season. Mulching heavily (3 to 4 inches of straw or wood chips) around plants helps regulate soil moisture and temperature, which pays dividends during heat waves. Salinity from over-fertilizing or poor-quality irrigation water can also damage root function and compound these problems.
Pests, diseases, and physical damage
Several common pests and diseases specifically attack beans during the flowering and pod-fill stages, which is exactly when flat or deformed pods show up.
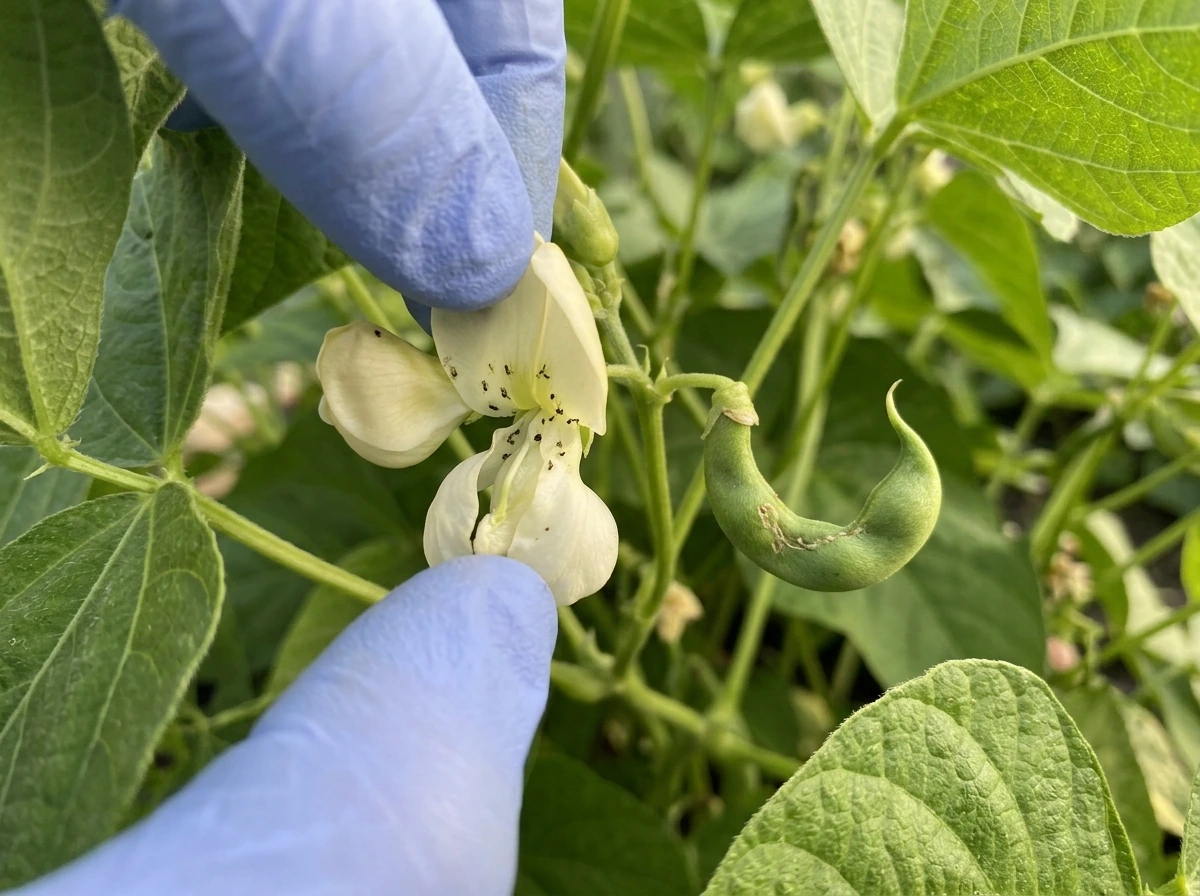
Thrips
Thrips are tiny insects (barely visible to the naked eye) that feed inside the flower while pods are being fertilized. Their feeding can scar the developing pod and cause anything from superficial streaking to severe twisting and distortion. If your pods are twisted or bent and you see fine silvery streaking on leaves, check inside your open flowers. You're looking for tiny, slender insects moving around. Heavy thrips pressure during bloom is one of the more frustrating causes of deformed pods because the damage happens before you can even see a pod forming.
Stink bugs and tarnished plant bugs
Both of these pierce-and-suck feeders inject enzymes or toxins into developing seeds and pods when they feed. Stink bug damage can leave seeds smaller, shriveled, and discolored inside an otherwise normal-looking pod. Tarnished plant bug feeding disrupts internal seed quality, leading to poorly filled, uneven pods. Check the undersides of leaves and the pods themselves for these insects in the morning when they're less active.
Bean anthracnose
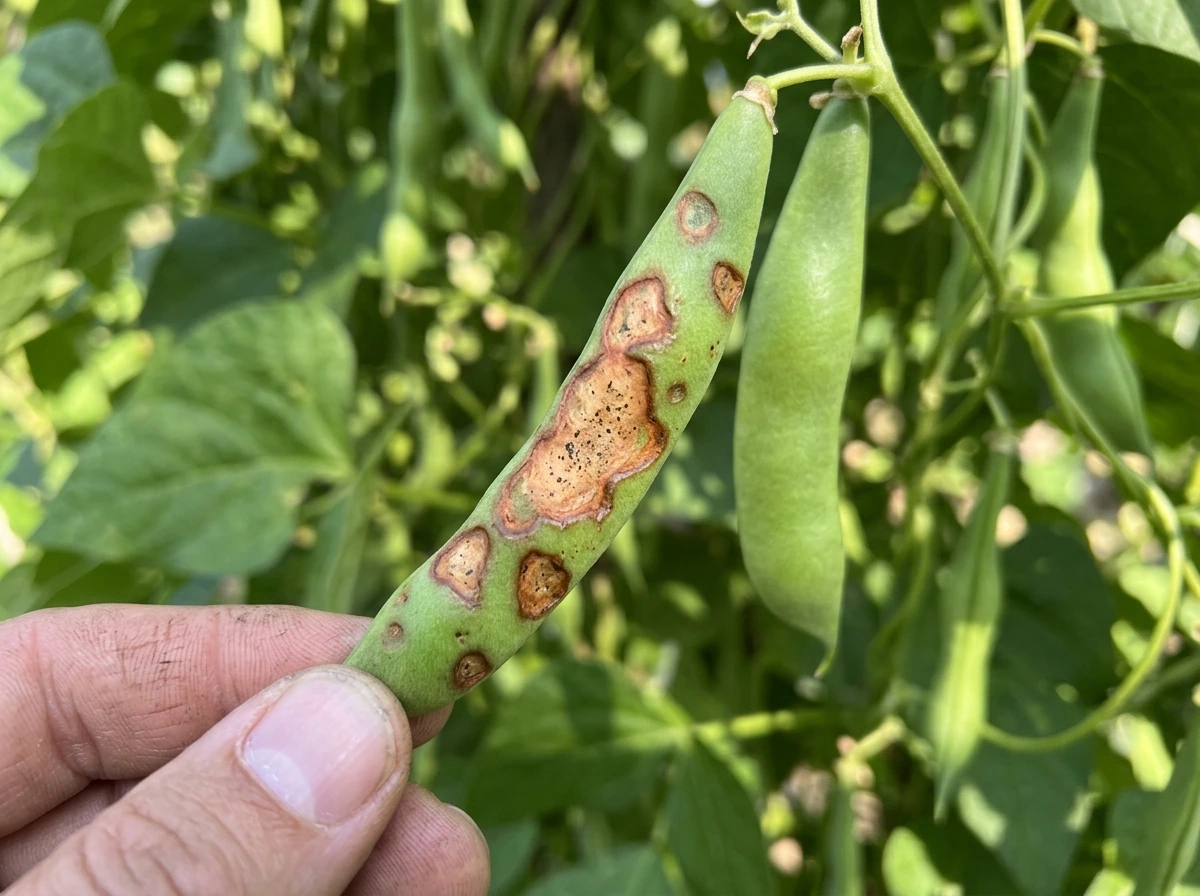
Anthracnose is a fungal disease that creates tan-to-rust lesions that develop into sunken cankers with a black or brownish-red raised border on pods. Young pods infected early can become distorted or drop off entirely. It spreads in wet conditions and through infected seed. If you see characteristic sunken spots with dark borders on your pods, anthracnose is likely involved.
Viral infections (Bean Common Mosaic and Bean Yellow Mosaic)
Both of these viruses can cause pods to become twisted, bent, and blotchy with alternating dark and light green patterns. The leaves will often show mosaic discoloration too. Viruses are spread by aphids, so if you have an aphid problem, watch for these symptoms. There's no cure once a plant is infected; remove and destroy affected plants to prevent spread, and manage aphid populations to protect the rest of your crop.
What to do today: your troubleshooting checklist
Here's how to work through this systematically, starting with your garden right now.
Step 1: Look at the pods carefully
Before changing anything, figure out exactly what kind of flat you're dealing with. Completely paper-flat pods with no seed development point to pollination failure or heat stress. Twisted or curved pods suggest pest damage (thrips especially) or viral infection. Lumpy, uneven pods often mean stress during seed fill. Pods where seeds are visibly bulging the sides mean you're harvesting too late. This distinction shapes everything else you do.
Step 2: Check your recent weather history
Think back to what temperatures were doing during your plants' flowering period. Were there days above 90 to 95°F? Nights above 75°F or below 60°F? Dry, windy stretches? If yes, heat and weather stress are the most likely cause, and the fix is to adjust your planting timing in the next cycle. Planting beans 2 to 3 weeks earlier in spring to get flowering done before peak summer heat, or planting a fall crop that flowers in cooler September temperatures, makes a significant difference.
Step 3: Check your soil moisture and drainage
Stick your finger 2 inches into the soil near your plants. It should feel moist but not waterlogged. If it's dry, water deeply right now and then set a schedule to keep soil consistently moist through pod development. If it's soggy or you have standing water, improve drainage before the next planting by amending with compost or raising the bed. Add 3 to 4 inches of mulch around your plants if you haven't already; this is the single easiest way to stabilize soil moisture between waterings.
Step 4: Review your fertilization
If your plants are lush and leafy but producing few pods, pull back on nitrogen. Don't add any more nitrogen-rich amendments this season. If you want to support pod fill on plants that are actively setting pods, a light application of a balanced fertilizer with potassium and a trace of boron (from a complete garden fertilizer) can help, but don't overdo it. If your soil hasn't been tested recently, a basic soil test (available for around $15 to $20 through most county extension offices) will tell you exactly what's missing and what isn't.
Step 5: Inspect for pests
Get out early in the morning and check inside open flowers for thrips, check the undersides of leaves for stink bugs and tarnished plant bugs, and look at your pods for the sunken dark-bordered lesions of anthracnose. For thrips, insecticidal soap or spinosad applied to flowers during bloom can reduce damage. For stink bugs and tarnished plant bugs, row covers before flowering or hand-picking are the most practical options in a home garden. If you see mosaic patterning on leaves and twisted pods, pull those plants and destroy them.
Step 6: Adjust your harvest cadence
If your pods are just overmature, start picking every two to three days. Don't let any pods fully mature on the vine unless you're intentionally saving seed or growing dry beans. Leaving overripe pods on the plant signals it to stop producing new pods, which compounds the problem. Harvest anything that's full-sized even if it's slightly past peak, because clearing those pods frees the plant's energy for new ones.
For your next planting cycle
The best prevention for most of these problems is timing and variety selection. Choose varieties suited to your climate (heat-tolerant varieties exist for hot zones), time planting so flowering happens when temperatures are consistently between 65 and 85°F, and keep soil moisture even from flowering through harvest. If you're curious about the broader nutritional needs of your bean crop, that's worth exploring in depth separately, since beans have some specific requirements that differ from heavier-feeding crops. A well-prepped bed with good drainage, a modest amount of compost (not fresh manure), and consistent watering will solve the majority of flat-pod problems before they start.
Quick-reference: causes and what to look for
| Cause | What you'll see | What to do |
|---|---|---|
| Heat stress during flowering (above 90-95°F) | Flat/empty pods, blossom drop, few pods setting | Adjust planting timing; shade cloth during heat waves; consistent watering |
| Too much nitrogen | Lush leaves, few pods, thin poorly filled pods | Stop nitrogen fertilizing; don't add fresh manure near beans |
| Inconsistent or low soil moisture | Curved/poorly filled pods, wilting, blossom drop | Water deeply and consistently; mulch 3-4 inches around plants |
| Waterlogging/poor drainage | Same as drought stress; yellowing leaves | Improve drainage; raise beds; reduce watering frequency |
| Harvesting too late | Seeds visibly bulging pod walls, tough pods | Pick every 2-3 days; harvest at full size before bulging |
| Harvesting too early | Thin, flat pods that haven't filled out | Wait until pods are firm and full-sized with small seeds inside |
| Thrips damage | Twisted/scarred pods, silvery leaf streaking | Inspect flowers; apply spinosad or insecticidal soap during bloom |
| Stink bugs / tarnished plant bugs | Shriveled/discolored seeds inside pod | Hand-pick; use row covers before flowering |
| Anthracnose (fungal) | Sunken dark-bordered cankers on pods | Remove infected material; improve air circulation; avoid overhead watering |
| Bean mosaic virus | Twisted pods, mosaic leaf pattern | Remove infected plants; manage aphids |
| Low potassium/calcium/boron | Poorly filled, weak pods | Soil test; apply balanced fertilizer with micronutrients |
FAQ
Can I fix flat pods that already formed, or is it too late?
Yes, but only in limited cases. If the plants are producing flat, empty pods because of heat or poor pollen viability, you cannot instantly “repair” already-formed pods. Your best move is to adjust conditions right now (consistent moisture, shade during extreme heat, and prompt harvesting of any partially filled pods) so the next set of flowers has better odds.
How can I tell whether the problem is drought stress versus waterlogged soil?
If you suspect overwatering, check for standing water and how fast the bed drains. Healthy beans want soil that stays evenly moist but not oxygen-poor. A quick field test is to dig a small hole and observe whether it holds water for hours after watering or rain, if it does, drainage is the likely driver.
What’s the best way to know whether I’m picking too early or too late?
Use the “seed bulge” cue. If you can feel individual large seeds pressing against the pod skin, you are past the snap stage. Waiting to that point usually makes pods look thick, lumpy, or misshapen rather than cleanly flat from underfilling.
If my bean plants look healthy and leafy, does that mean nutrients are fine?
Not always, and this is a common mistake. Beans can look vigorous after too much nitrogen, but the symptom pattern is few pods and pods that are thinner or poorly filled. If you recently added fresh manure, high-N fertilizer, or heavy compost, pause nitrogen and rely on balanced nutrition for the next cycle.
Why would calcium deficiency happen if I already have calcium in my soil?
Yes, even if you applied calcium before planting. If roots are impaired by salinity, compaction, root disturbance, or waterlogged beds, the plant may not transport calcium effectively to pod tissue. Focus on restoring root function by improving drainage, reducing salts, and avoiding repeated shallow cultivation around roots.
Should I add boron to prevent flat or underfilled pods?
Boron is one of those nutrients where “more” can backfire. Over-application can lead to pod quality problems and can also harm plant growth. If you do not have a recent soil test, avoid adding boron separately and prefer a complete fertilizer that includes only trace amounts.
What should I check first: heat, watering, pests, or nutrients?
Take a look at timing. If flat pods coincide with hot spells during flowering and pod set, heat stress is the front-runner. If flat pods persist despite cooler weather or occur at the start of the flowering window, look next at moisture consistency, pests in flowers, and variety differences.
Will trellising pole beans prevent flat pods?
Trellising can help pole beans, but it is not a guarantee against flat pods. It does reduce some secondary stress by improving airflow and ease of picking, yet flat, empty pods still usually trace back to failed pollination, weather during bloom, or nutrient and moisture issues during seed fill.
Can row covers fix pest-caused deformed or flat pods?
Row covers can reduce insect feeding, but use timing carefully. Cover only when needed and remove during peak pollinator activity if flowers require insect assistance in your area. If your main problem is thrips, targeted treatments to open flowers during bloom are more effective than covering after pods start.
How do I confirm thrips are the cause, not just weather?
Thrips feeding tends to produce twisting or distortion and sometimes silvery streaking on foliage, and it starts during flowering. The most practical confirmation is to inspect open flowers early in the day, look inside for tiny mobile insects, and compare pods from unaffected plants nearby.
If I see mosaic patterns, what should I do right away?
Start by removing plants showing mosaic leaf patterns plus twisted or blotchy pods, then destroy the material to prevent spread. For prevention going forward, manage aphids early and keep weeds down because aphids can move viruses between plants.
What are the best next-step actions if the cause seems like disease rather than weather?
Viruses and anthracnose often point to prevention steps for the next planting rather than a quick fix. For anthracnose, avoid wetting foliage from above, remove infected pods, and do not save seed from affected plants. For viruses, focus on aphid control and early removal of symptomatic plants.
Could what I’m calling flat be normal for my bean variety?
Yes, and it changes diagnosis. Romano beans are bred to have flatter pods by design, so “flat” may simply be the cultivar expression. Confirm by checking whether your pods were flat from the beginning of pod formation, and compare with known-labeled plants or seed packet descriptions.
Next Article
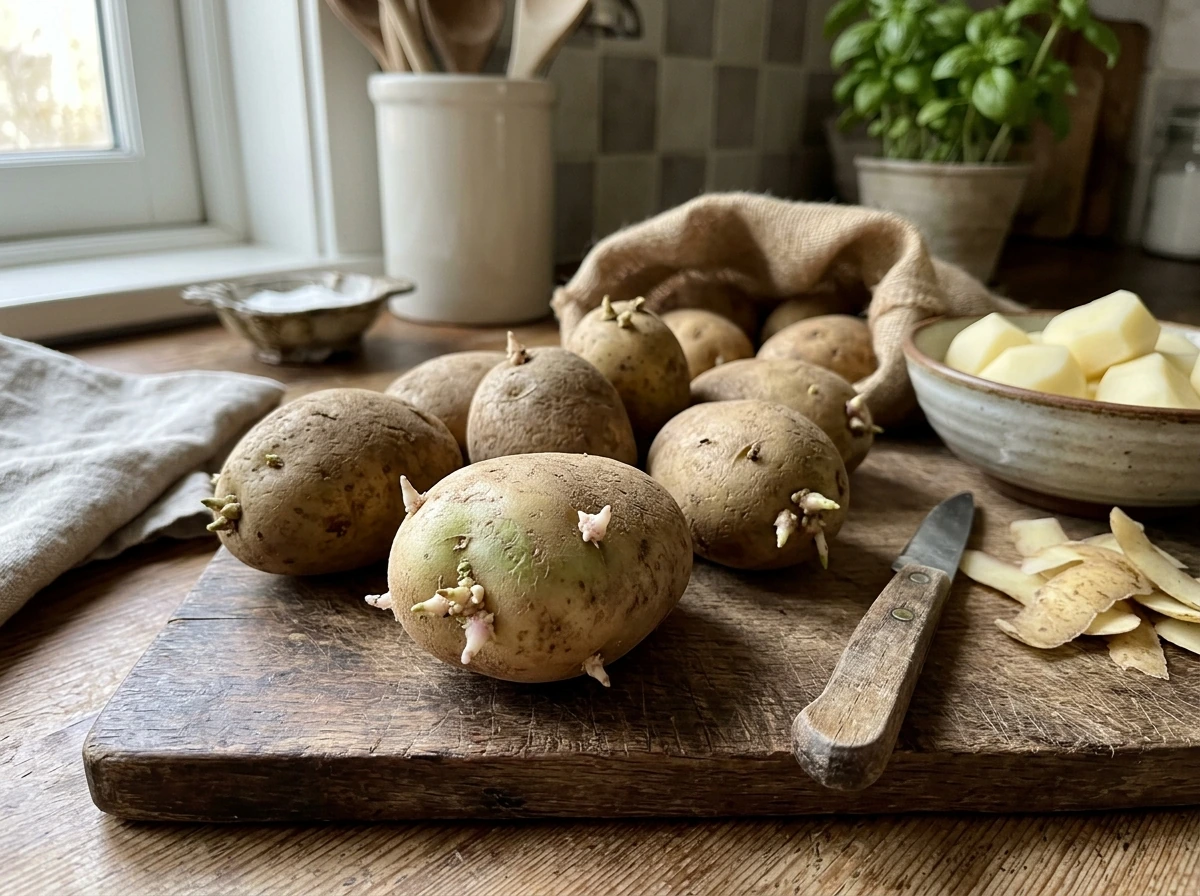
Potato Grow Sprouts: Can You Eat Them Safely?
Learn if sprouted potatoes and potato shoots are safe to eat, what to discard, and how to prevent solanine risk.